
Testing Your Drupal Site with Behat
If automated testing is not already part of your development workflow, then it’s time to get started. Testing helps reduce uncertainty by ensuring that new features you add to your application do not break older features. Having confidence that your not breaking existing functionality reduces time spent hunting bugs or getting reports from clients by catching them earlier.
Unfortunately, testing still does not get the time and attention it needs when you’re under pressure to make a deadline or release a feature your clients have been asking for. But—like using a version control system and having proper development, staging, and production environments—it should be a routine part of how you do your work. We are professionals, after all. After reading all the theory, I only recently took the plunge myself. In this post, I’ll show you how to use Behat to test that your Drupal site is working properly.
Before we dive in, the Behat documentation describes the project as:
[…] an open source Behavior Driven Development framework for PHP 5.3+. What’s behavior driven development, you ask? It’s a way to develop software through a constant communication with stakeholders in form of examples; examples of how this software should help them, and you, to achieve your goals.
Basically, it helps developers, clients, and others communicate and document how an application should behave. We’ll see shortly how Behat tests are very easy to read and how you can extend them for your own needs.
Mink is an extension that allows testing a web site by simulating interacting with it through a browser to fill out form fields, click on links, and so forth. Mink lets you test via Goutte, which makes requests and parses the contents but can’t execute JavaScript. It can also use Selenium, which controls a real browser and can thus test JS and Ajax interactions, but Selenium requires more configuration.
Requirements
To get started, you’ll need to have Composer on your machine. If you don’t already, head over to the Composer Website. Once installed, you can add Behat, Mink, and Mink drivers to your project by running the following in your project root:
composer require behat/behat
composer require behat/mink
composer require behat/mink-selenium2-driver
composer require behat/mink-extension
Once eveything runs, you’ll have a composer.json file with:
    "require": {
        "behat/behat": "^3.1",
        "behat/mink": "^1.7",
        "behat/mink-selenium2-driver": "^1.3",
        "behat/mink-extension": "^2.2"
    },
This will download Behat and it’s dependencies into your vendor/ folder. To check that it works do:
vendor/bin/behat -VThere are other ways to install Behat, outlined in the quick introduction.
The Drupal community has a contrib project, Behat Drupal Extension, that is an integration for Behat, Mink, and Drupal. You can install it with the requre command below. I had to specify the ~3.0 version, otherwise composer couldn’t satisfy dependencies.
composer require drupal/drupal-extension:~3.0And you’ll have the following in your composer.json:
"drupal/drupal-extension": "~3.0",Configuring Behat
When you run Behat, it’ll look for a file named behat.yml. Like Drupal 8, Behat uses YAML for configuration. The file tells Behat what contexts to use. Contexts provide the tests that you can run to validate behavior. The file configures the web drivers for Mink. You can also configure a region_map which the Drupal extension uses to map identifiers (left of the :) to CSS selectors to identify theme regions. These come in very handy when testing Drupal theme output.
The one I use looks like:
default:
  suites:
    default:
      contexts:
        - Drupal\DrupalExtension\Context\DrupalContext
        - Drupal\DrupalExtension\Context\MarkupContext
        - Drupal\DrupalExtension\Context\MessageContext
        - FeatureContext
  extensions:
    Behat\MinkExtension:
      goutte: ~
      javascript_session: selenium2
      selenium2:
        wd_host: http://local.dev:4444/wd/hub
        capabilities: {"browser": "firefox", "version": "44"}
      base_url: http://local.dev
    Drupal\DrupalExtension:
      blackbox: ~
      region_map:
        breadcrumb: '#breadcrumb'
        branding: '#region-branding'
        branding_second: '#region-branding-second'
        content: '#region-content'
        content_zone: '#zone-content'
        footer_first: '#region-footer-first'
        footer_second: '#region-footer-second'
        footer_fourth: '#region-footer-fourth'
        menu: '#region-menu'
        page_bottom: '#region-page-bottom'
        page_top: '#region-page-top'
        sidebar_first: '#region-sidebar-first'
        sidebar_second: '#region-sidebar-second'
Writing a Simple Feature
Now comes the fun part. Let’s look at writing a feature and how to test that what we expect is on the page. The first time we run it, we need to initialize Behat to generate a FeatureContext class. Do so with:
vendor/bin/behat --initThat should also create a features/ directory, where we will save the features that we write. To behat, a feature is test suite. Each test in a feature evaluates specific functionality on your site. A feature is a text file that ends in .feature. You can have more than one: for example, you might have a blog.feature, members.feature, and resources.feature if your site has those areas available.
Of course, don’t confuse what Behat calls a feature—a set of tests—with the Features module that bundles and exports related functionality into a Drupal module.
For my current project, I created a global.feature file that checks if the blocks I expect to have in my header and footer are present. The contents of that file are:
Feature: Global Elements

  Scenario: Homepage Contact Us Link
    Given I am on the homepage
    Then I should see the link "Contact Us" in the "branding_second" region
    Then I should see the "Search" button in the "branding_second" region
    Then I should see the "div#block-system-main-menu" element in the "menu" region
As you can see, the tests is very readable even though it isn’t purely parsing natural language. Indents help organize Scenarios (a group of tests) and the conditions needed for each scenario to pass.
You can set up some conditions for the test, starting with “Given”. In this case, given that we’re on the homepage. The Drupal Extension adds ways to specify that you are a specific user, or have a specific role, and more.
Next, we list what we expect to see on the webpage. You can also tell Behat to interact with the page by specifying a link to click, form field to fill out, or a button to press. Again here, the Drupal extension (by extending the MinkExtension), provides ways to test if a link or button are in one of our configured regions. The third test above uses a CSS selector, like in jQuery, to check that the main menu block is in the menu region.
Testing user authentication
If you’re testing a site that is not local, you can use the drush api driver to test user authentication, node creation, and more. First, setup a drush alias for your site (in this example, I’m using local.dev. Then add the following are in your behat.yml:
      api_driver: 'drush'
      drush:
        alias: "local.dev"
You can then create a scenario to test the user login’s work without having to specify a test username or password by tagging them with @api
  @api
  Scenario: Admin login
    Given I am on the homepage
    Given I am logged in as a user with the "admin" role
    Then I should see the heading "Welcome" in the "content" region
If you’ve customized the username text for login, your test will fail. Don’t worry! Just add the following to your behat.yml file so that the test knows what text to look for. In this case, the username field label is just E-mail.
      text:
        username_field: "E-mail"
Custom Testing by Extending Contexts
When you initialized Behat, it created a features/bootstraps/FeatureContext.php file. This can be a handy class for writing custom tests for unique features on your site. You can add custom tests by using the Drupal Extension’s own sub-contexts. I changed my Feature Context to extend the Mink Context like this:
class FeatureContext extends MinkContext implements SnippetAcceptingContext {Note that if you do that, you’ll need to remove MinkContext from the explicit list of default context in behat.yml.
No matter how you organize them, you can then write custom tests as methods. For example, the following will test that a link appears in the breadcrumb trail of a page. You can use CSS selectors to find items on the page, such as the ‘#breadcrumb’ div in a theme. You can also re-use other tests defined by the MinkContext like findLink.
/**
 * @Then I should see the breadcrumb link :arg1
*/
public function iShouldSeeTheBreadcrumbLink($arg1)
{
   // get the breadcrumb
   /**
     * @var Behat\Mink\Element\NodeElement $breadcrumb
     */
   $breadcrumb = $this->getSession()->getPage()->find('css', 'div#breadcrumb');

   // this does not work for URLs
   $link = $breadcrumb->findLink($arg1);
   if ($link) {
      return;
   }

   // filter by url
   $link = $breadcrumb->findAll('css', "a[href=\"{$arg1}\"]");
   if ($link) {
      return;
   }

   throw new \Exception(
       sprintf("Expected link %s not found in breadcrumb on page %s",
           $arg1,
           $this->getSession()->getCurrentUrl())
    );
}
If your context implements the SnippetAwareContext, behat will generate the Docblock and method signature when it encounters an unknown test. If you’re feature has the following:
Then I should see "foo-logo.png" as the header logo.When you run your tests, behat will output the error message below that you can copy and paste to your context. Anything in quotes becomes a parameter. The DocBlock contains the annotation Behat uses to find your test when it’s used in a scenario.
/**
* @Then I should see :arg1 as the header logo.
*/
public function iShouldSeeAsTheHeaderLogo($arg1)
{
   throw new PendingException();
}
Selenium
Follow the Behat docs to install selenium: http://mink.behat.org/en/latest/drivers/selenium2.html. When you’re testing you’ll need to have it running via:
java -jar /path/to/selenium-server-standalone-2.53.0.jar To tell Behat how to use selenium your behat.yml file should have:
      selenium2:
        wd_host: http://local.dev:4444/wd/hub
        capabilities: {"browser": "firefox"}
You’ll also need to have Firefox installed. OF course, at the time of this writing, Firefox is asking people to transition from use Webdriver to Marionette for automating browser usage. I have Firefox 47 and it’s still working with Webdriver as far as I can tell. I have not found clear, concise instructions for using Marionette with Selenium. Another option is to use Phantom.JS instead of Selenium for any features that need a real browser.
Once everything is working—you’ll know it locally because a Firefox instance will pop up—you can create a scenario like the following one. Use the @javascript tag to tell Behat to use Selenium to test it.
@javascript
Scenario: Modal Popup on click
Given I am at "/some/page"
When I click "View More Details"
Then I wait for AJAX to finish
Then I should see an "#modal-content" element
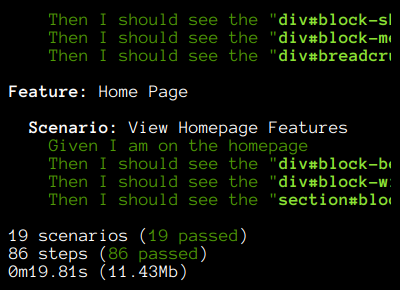
Then I should see text matching "This is a Modal"Conclusion
If you don’t have tests for your site, I urge you to push for adding them as part of your ongoing work. I’ve slowly added them to my main Drupal client project over the last few months and it’s really started to pay off. For one, I’ve captured many requirements and expectations about how pages on the site work that were only in my or the project manager’s heads, if not lost in a closed ticket somewhere. Second, whenever I merge new work in and before any deploy I can run tests. If they are all green, I can be confident that new code and bug fixes haven’t caused a regression. At the same time, I now have a way to test the site that makes it less risky to re-factor or reorganize code. I didn’t spend a lot of time building tests, but as I work on a new feature or fix a bug, writing a test is now just part of confirming that everything works as expected. For complicated features, it’s also become a time saver to have a test that automates a complicated interactions—like testing a 3-page web form, since Behat can run that scenario much faster than I can manually.
The benefits from investing in automated testing outweigh any initial cost in time and effort to set them up. What are you waiting for?
Leave a comment
Use the form below to leave a comment:


Responses and Pingbacks
August 11th, 2016 at 11:07 pm
[…] the php[architect] site there’s a new tutorial posted from Oscar Merida about testing Drupal sites with Behat, a popular PHP-based “Behavior Driven Development” testing tool to help ensure your […]
August 12th, 2016 at 4:09 am
Hi,
Very nice article, but what I was expecting was more something like this http://stakeholderwhisperer.com/posts/2014/10/introducing-modelling-by-example, and not just ui testing of drupal.
Maybe, in the next one 🙂
August 12th, 2016 at 10:19 am
Thanks for the link. I definitely came at this from a need to test an existing Drupal UI, not from a “pure” BDD approach since the project was already built. The ubiquitous language is interesting and I’ll do some more reading about it. At the moment, I’m not sure it makes sense to build such custom methods for testing something unlikely to change.
September 1st, 2016 at 9:17 am
[…] Testing Your Drupal Site with Behat […]
July 11th, 2017 at 1:37 pm
[…] https://www.phparch.com/2016/08/testing-your-drupal-site-with-behat/ […]
July 13th, 2018 at 6:52 am
I was struggling to find out why Behat did not recognize “I am on the homepage” command. After searching for a while, I found out that drupal-extension ships with a default behat.yml file (named behat.yml.dist) that lists more contexts. Maybe you should recommend in ‘Configuring Behat’ to start with that distributed file.