Building the Backside – Part 1
 Editor’s Note: This is part three of a four-part series on building mobile dashboards with Flash and PHP. You can still read Part One and Part Two on php|architect’s Website.
In case you did not know this, I love PHP. It is the Swiss Army Knife of development languages, and I can do dang near anything using it. These days, as “web” increasingly means “the backside of my application”, PHP domination of the web is growing. These days though, PHP means a lot more than just a way to dynamically generate HTML. Many PHP applications these days don’t involve a browser at all, or at the very least, don’t talk to it directly like in days past. Today, many of our client applications are desktop applications or mobile applications that use the payload from the PHP application to do more than just put words on the screen. As PHP developers, we’ve moved into a new phase. One where we have to concentrate less on what things look like and more on how things work. For developers like myself, who couldn’t draw a stick-figure if his life depended on it, this is very good news.
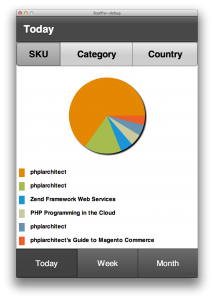
So we find ourselves today, working on the backside of an application that will run on an iPad. For the pretty stuff, see Marco’s article titled “Mobile Dashboards Made Easy”. It gives you the details on what the application does with the data it gets. Our job is to pull the data, and then package it in the way the application expects it.
A Journey of a Thousand Lines of Code, Starts at the Yak Barbers.
We will build the backside of the application using Zend Framework. For those of you that use other frameworks, the concepts shouldn’t be too difficult to follow. Here’s a thought, though – since you are learning here, why not grab Zend Server and Zend Framework to go with your Flash Builder and set them all up? Break out of your existing development paradigm for the time it takes you to run this tutorial and experiment with new tools. The worst case scenario is that it validates your tool choice in your mind. In the best case, you pick up a new tool or two for your toolbox. In my case, though, I used a plain vanilla Apache install on Windows, PHP 5.3.x and Flex Builder 4. I did not get to experience the round-trip debugging feature of Flex Builder 4, but we’ll worry about that at a later date.
Once you have a working environment – *AMP stack and at the very least, Zend Framework – downloaded and put somewhere and the Zend Tool operational, then we can proceed. If you do not have Zend Tool set up, you need to stop, go read the section of the Zend Framework manual that talks about Zend Tool and get it set up. It’s not difficult, but it will make life ever so much easier, especially since we use it for getting things set up.
OK, now that this is set up, there’s a little more yak shaving to do. Since this is an API running over HTTP, you will need a working web server. In most cases, this means an Apache conf file to define a virtual name based server. I call the application dashboard, and on my laptop, it is set up as laptop.local. However you want to set it up is fine, just remember that the client needs to be able to get to it. In my case, the client is running straight out of Flash Builder 4 so adding dashboard.local to my hosts file was all that was necessary for everything to work. If you are working in a more complex setup, you will want to figure out a better way. Personally, I am all about making this as easy as possible so I can get on with the coding.
By now you have Apache set up and running and are ready to get your app on. From the directory that contains your projects directory (as specified in your web server config file), go ahead and execute this:
zf create project dashboard
Do the Database Dance
Since this application needs a database, I’ve provided you with one. It’s a very small sample of the php|architect core database. I’ve only provided the tables and fields necessary to demonstrate the features of the client.
If you download the source code, you will find a sample.sql with everything you need to create a database named sample in a MySQL RDBMS. All you need to do is create the database in your MySQL server, and then import it.
Once you have created it, you need to tell your application how to access it. In application/configs/apalication.ini you will find the resource.db section.
resources.db.adapter = “PDO_Mysql”
resources.db.params.dbname = “sample”
resources.db.params.username = “root”
resources.db.params.password = “”
resources.db.params.host = “localhost”
Adjust the parameters to suite your configuration, and save the file. (Yes, I run MySQL on my local laptop with root and no password. No, you should never do that, ever, not even as a joke.)
There, we have now completed the yak shaving portion of the program…almost. One final thing you have to do. I really don’t understand why Zend Tool doesn’t do this one last step for you. Navigate to the public directory created by the zf create project above. In there, you will find an .htaccess file. At the top of that file, put the line:
SetEnv APPLICATION_ENV development
Now save and exit the file.
There, now you are completely done with the yak shaving portion of the program. Now that you’ve gone through all the steps, I should probably point out that you can download the complete source code for dashboard, unzip it somewhere, point Apache to it and be on your way. Yes it’s faster, but you don’t learn as much.
The Front End
Hopefully, by this point, you’ve already read Marco’s article on how to build the front end. If you’ve not, stop and do it now. Without that, you have no idea if you did it right. For my testing, I pulled up Flash Builder 4, imported his project into its own directory, set it to display like an iPhone, and then simply ran the application locally to test. With both the front end and back end running on the same machine, debugging anything is very simple.
It should be noted that if you are using Zend Studio/Zend Server and Flash Builder 4, your life will be a lot easier as you can use their round-trip debugging. You can set breakpoints within the server side of the application, run the client and have things pause while you work out the details on the server side. This application is simple enough so that there doesn’t need to be a lot of debugging, but when things go wrong, not being able to see exactly what is going wrong can be a real pain.
The only downside to using the integrated system is that you have to create the projects using Flash Builder 4. Since I used Zend Tool to create them, I couldn’t use the whole round-trip debugging tool.
Once you have the client up and running, either within Flash Builder 4 or on a mobile device, it’s time to dive in.
API!=RESTful
Before we get started, I feel it necessary to talk a little about the API that we are building. Not all APIs are RESTful; this one certainly isn’t. This API is more along the lines of RPC over HTTP. One of the biggest things that keep this API from being RESTful is that we use POST to talk to the web server when we are requesting the data. In REST, the HTTP verbs are important. I am using POST here merely as a convenience as it allows us to submit larger payloads than can be submitted on the URL itself.
Second, the application itself does not return HTTP Result Codes other than 200. We are not talking to a web browser, therefore we can return our errors any way we want to.
If this application was going to be multi-client and a web browser would be a possible option, I would have designed it slightly differently in this respect. I would have returned proper HTTP result codes for all conditions. However, the client of this API is only going to be our Flex-based application, therefore we only need 1 result code, 200. We always return 200 on a successful call, regardless of whether the procedure worked correctly or not. Internally, we have ways of dealing with errors, and the payload tells us what went wrong.
If there is something else wrong, i.e. the server had issues, the web server will return the appropriate code, and the client will deal with it as it will.
Leave a comment
Use the form below to leave a comment:


Responses and Pingbacks
September 23rd, 2011 at 2:49 am
[…] Source: PHP – Google Blog Search […]
December 2nd, 2011 at 9:52 pm
“In application/configs/apalication.ini you will find the resource.db section” I bet you won’t, possibly in application.ini